Tiling a Backsplash with No Prior Experience
Tiling a backsplash may seem like a daunting task, especially if you have no prior experience with DIY projects or home improvement. The idea of handling tools, adhesives, and fragile tiles can be intimidating, but with the right guidance and a bit of patience, tiling a backsplash can be a manageable project for beginners. In this article, we will explore the steps involved in tiling a backsplash with no prior experience, highlighting key tips and tricks to help you achieve a professional-looking result.
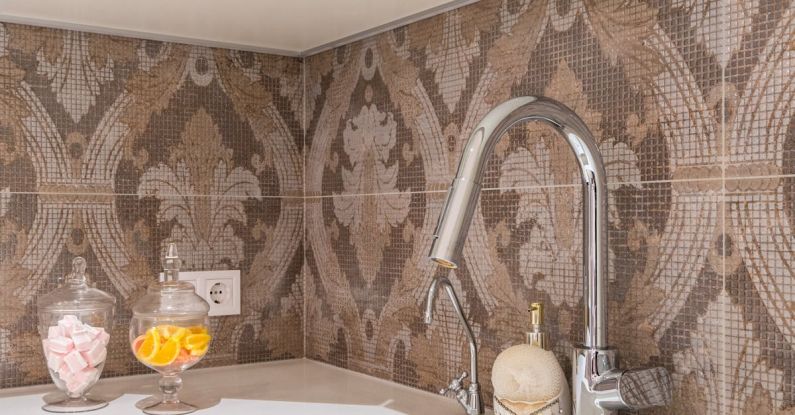
Choosing the Right Tiles
The first step in tiling a backsplash is selecting the right tiles for your project. When choosing tiles, consider the size, color, and material that will best complement your kitchen or bathroom. Subway tiles are a popular choice for backsplashes due to their timeless appeal and ease of installation. Alternatively, mosaic tiles can add a pop of color and texture to your space. Whichever option you choose, make sure to measure the area accurately to determine the quantity of tiles needed.
Gathering the Necessary Tools and Materials
Before you begin tiling, gather all the necessary tools and materials. You will need tile adhesive, grout, spacers, a trowel, a tile cutter, a sponge, and a level. It is essential to invest in quality tools to ensure a smooth and efficient tiling process. Additionally, make sure to wear appropriate safety gear, such as gloves and goggles, to protect yourself during the project.
Preparing the Surface
Proper surface preparation is crucial for a successful tiling project. Ensure that the wall surface is clean, dry, and free of any debris or grease. Use a level to mark a guideline where the first row of tiles will be placed. This will help you maintain a straight and even layout throughout the installation process. Applying a primer to the wall can help improve adhesion and ensure a long-lasting finish.
Applying the Adhesive and Setting the Tiles
Once the surface is prepared, it is time to apply the adhesive and start setting the tiles. Use a notched trowel to spread the adhesive evenly on the wall, working in small sections to prevent it from drying out. Place the tiles on the adhesive, using spacers to maintain consistent grout lines. Press each tile firmly into place, making sure they are level and aligned with the guideline. Repeat this process until the entire backsplash is tiled.
Grouting and Finishing Touches
After the adhesive has dried, it is time to grout the tiles. Mix the grout according to the manufacturer’s instructions and apply it to the spaces between the tiles using a grout float. Work the grout into the joints at a 45-degree angle, ensuring that all gaps are filled. Once the grout has set for a few minutes, use a damp sponge to wipe away any excess grout from the tile surfaces. Allow the grout to cure completely before applying a sealer to protect the finish.
Achieving a Professional Result
Tiling a backsplash with no prior experience may seem challenging, but with the right preparation and technique, you can achieve a professional-looking result. By choosing the right tiles, gathering the necessary tools and materials, preparing the surface, and following the proper installation and finishing steps, you can transform your space and add a touch of elegance to your kitchen or bathroom.
In conclusion, tiling a backsplash is a rewarding DIY project that can be accomplished by beginners with no prior experience. With attention to detail, patience, and a willingness to learn, you can successfully tile a backsplash and enhance the aesthetic appeal of your home. So, roll up your sleeves, gather your tools, and embark on this exciting journey to transform your space with a beautiful tiled backsplash.